
CẤU HÌNH BẬT SSL VÀ REDIRECT HTTPS ODOO BẰNG IIS

CẤU HÌNH BẬT SSL VÀ REDIRECT HTTPS ODOO BẰNG IIS

Source: 

  • https://shyju.wordpress.com/2019/04/10/enable-iis-redirect-and-https-for-odoo-on-windows-server/
  • https://www.ssl.com/how-to/redirect-http-to-https-with-windows-iis-10/


1. DOWNLOAD VÀ CÀI ĐẶT:

2. CẤU HÌNH PROXY

Enable Proxy

Open IIS Management console >> application request routing

Open proxy settings

Enable Proxy

3. CẤU HÌNH REVERSE PROXY RULE

Lưu ý: khi tạo xong rule nhờ "move up" redirect rule lên trên reverse proxy rule nhé


Setup a Reverse Proxy rule using the Wizard.

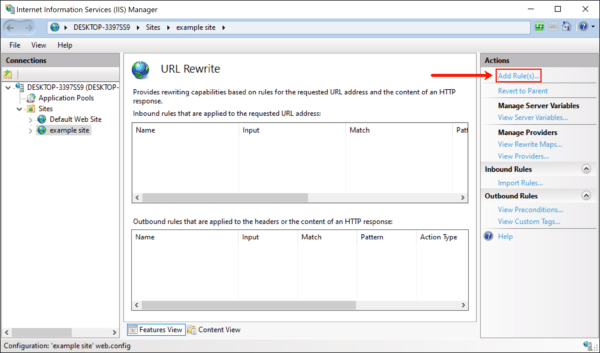
Open the IIS Manager Console and click on the Default Web Site from the tree view on the left. Select the URL Rewrite Icon from the middle pane, and then double click it to load the URL Rewrite interface.

Chose the ‘Add Rule’ action from the right pane of the management console, and the select the ‘Reverse Proxy Rule’ from the ‘Inbound and Outbound Rules’ category.

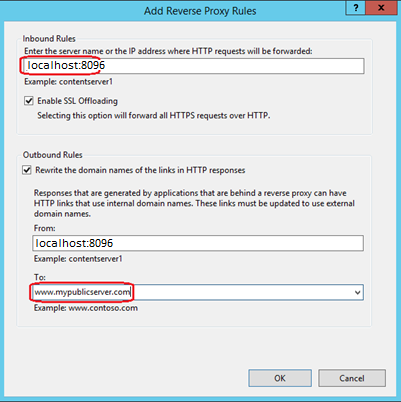
Now we can proceed to fill in the routing information based on the diagram above in the Wizard window that is provided to us.

Please make sure odoo is accessible from the same server http://localhost:8069 or change the below as per your odoo URL.

4. CẤU HÌNH REDIRECT TO HTTPS 

If you want to enable redirect from http to https follow the below URL and make sure to put it as the first rule. ( Use “Move up” arrow after you write the redirect rule)

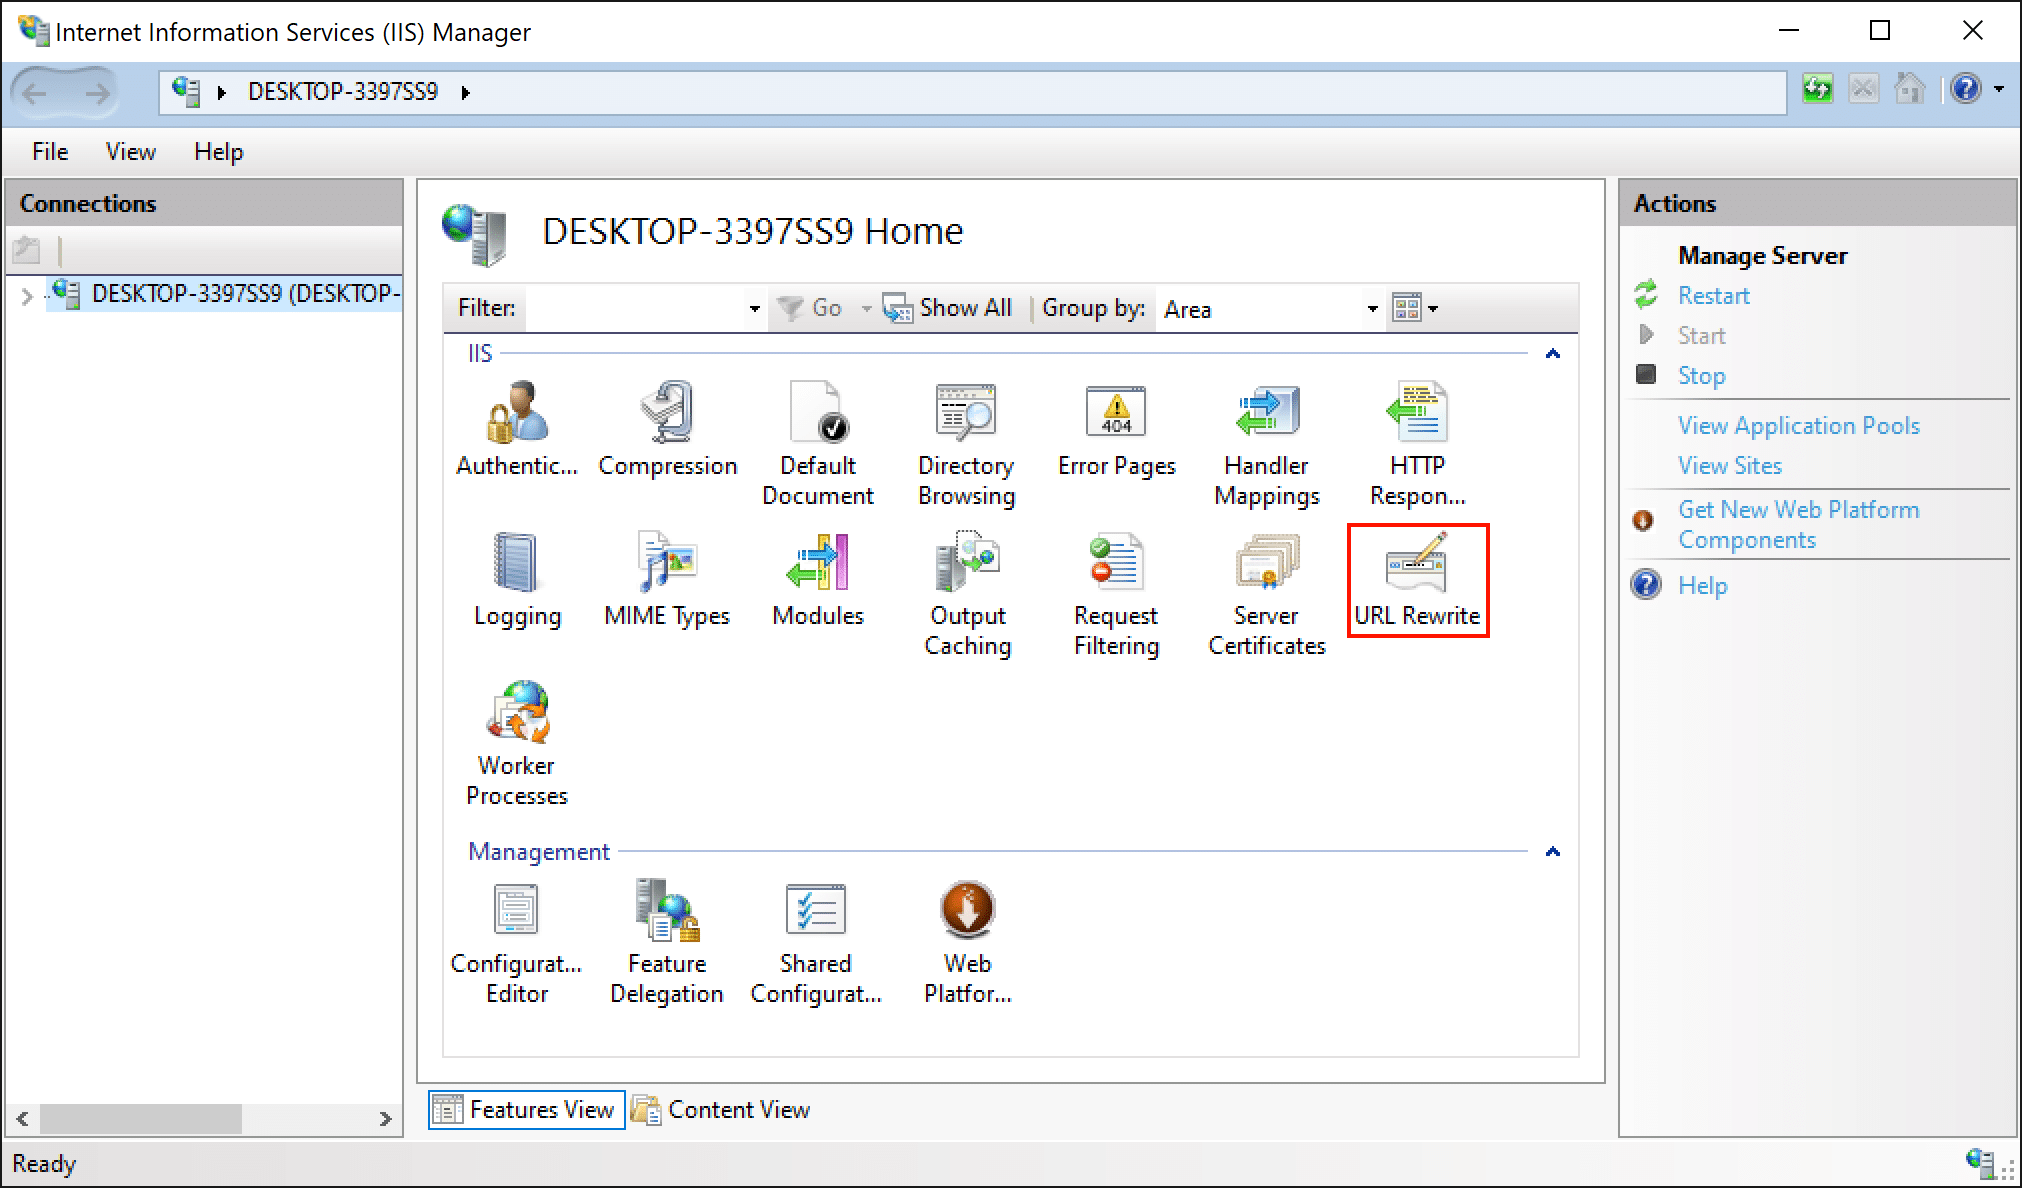
  1. Download and install the IIS URL Rewrite module, then launch IIS Manager.
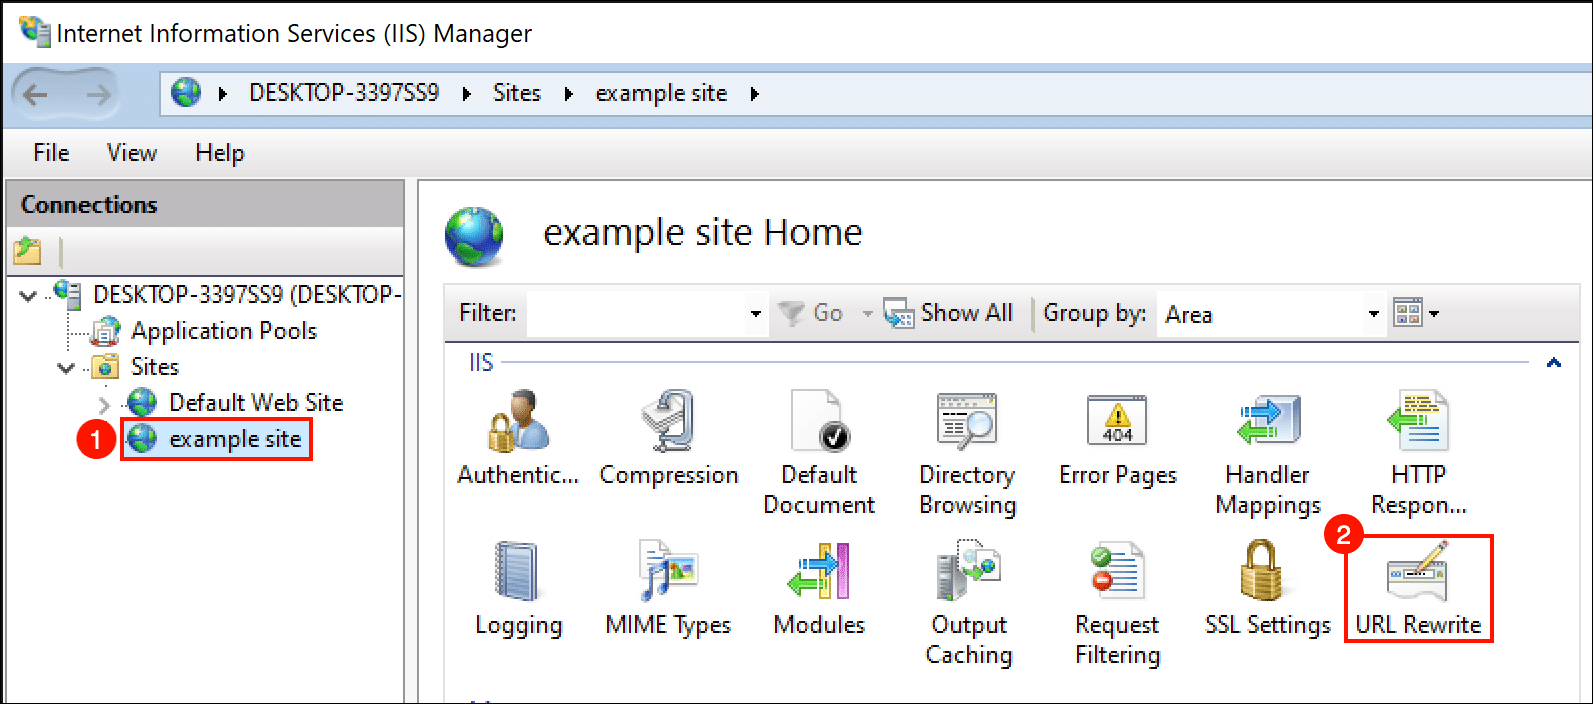
  2. Select the website you want to apply redirection to, then double-click URL Rewrite.
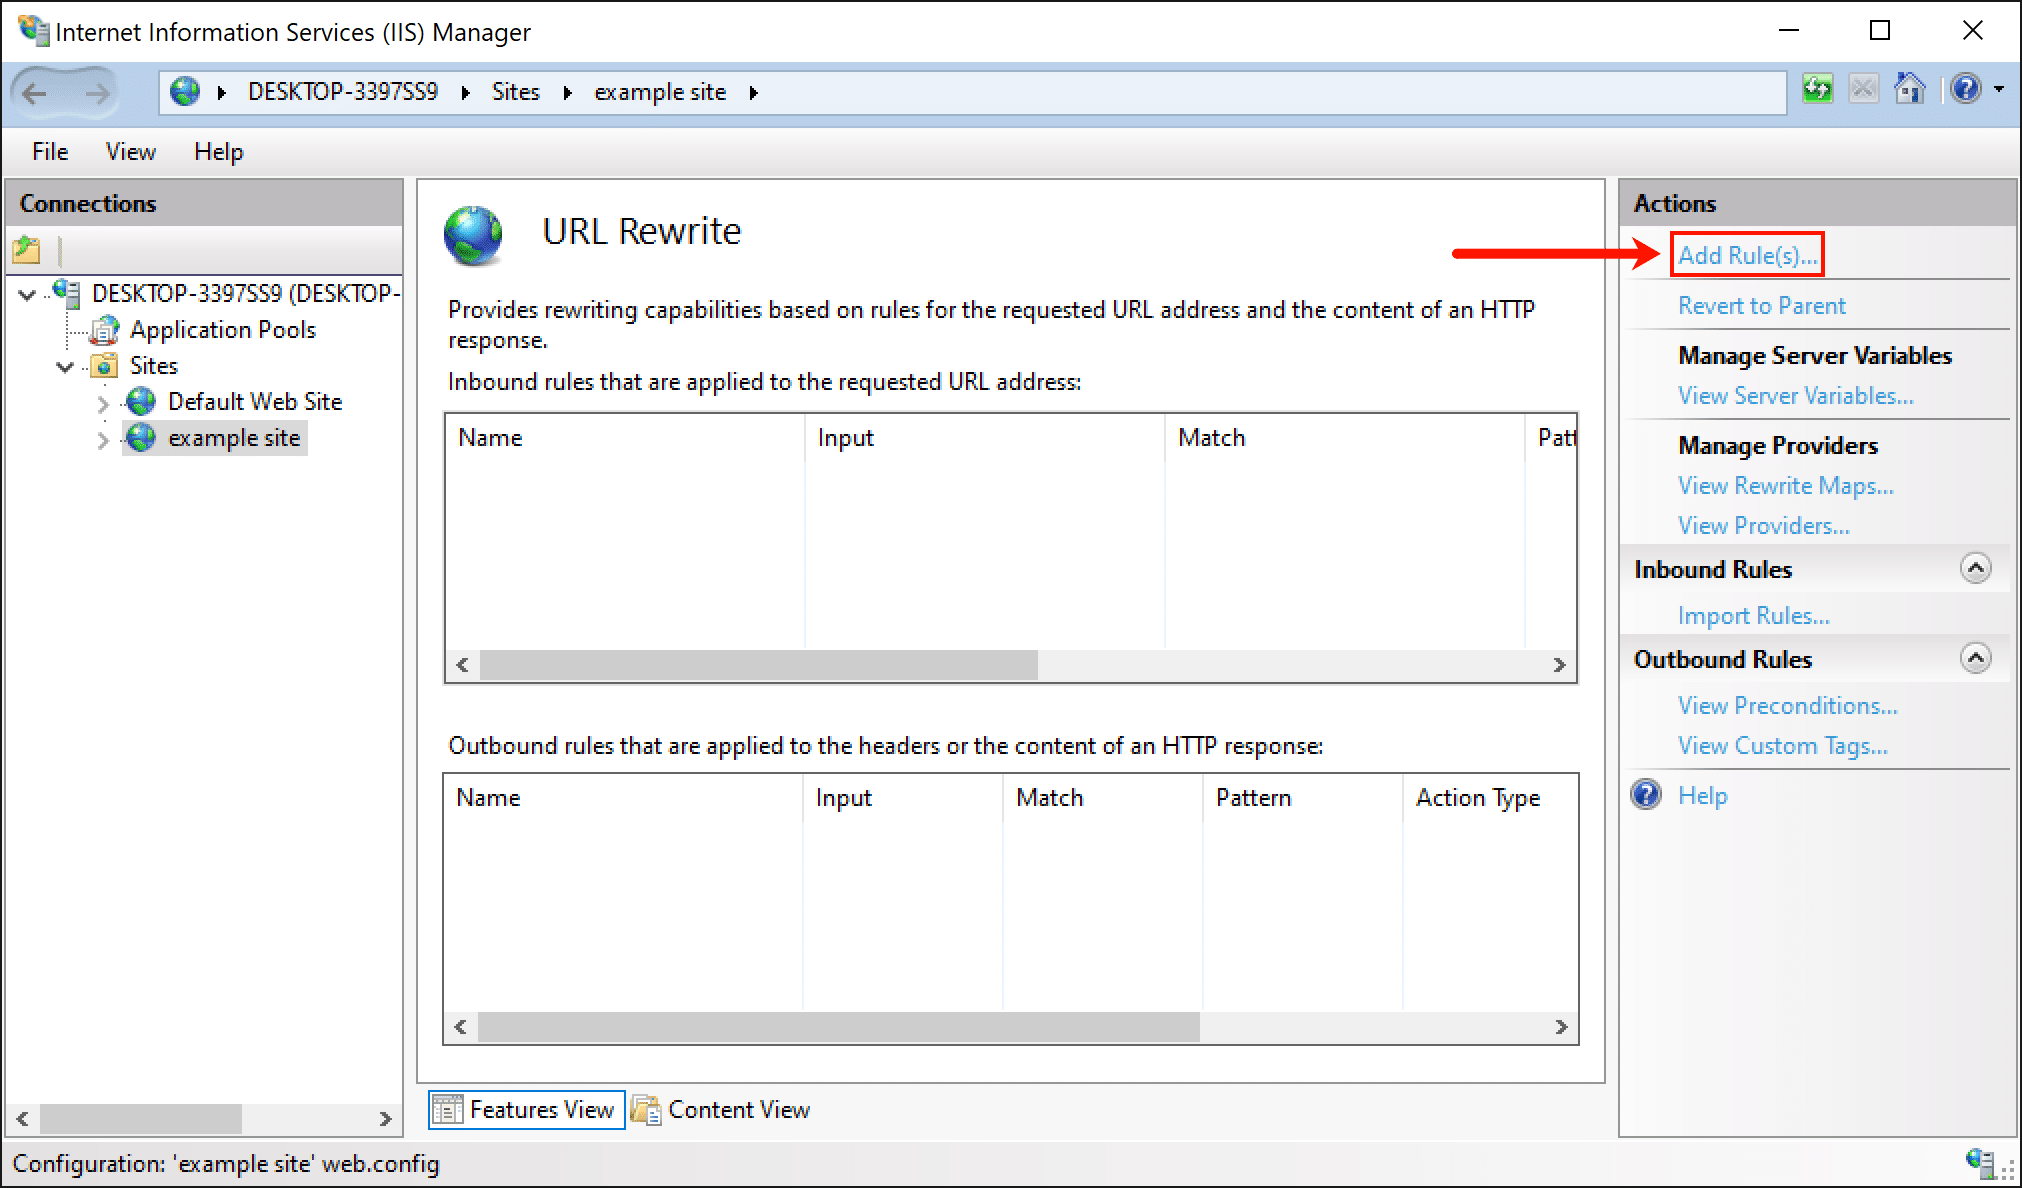
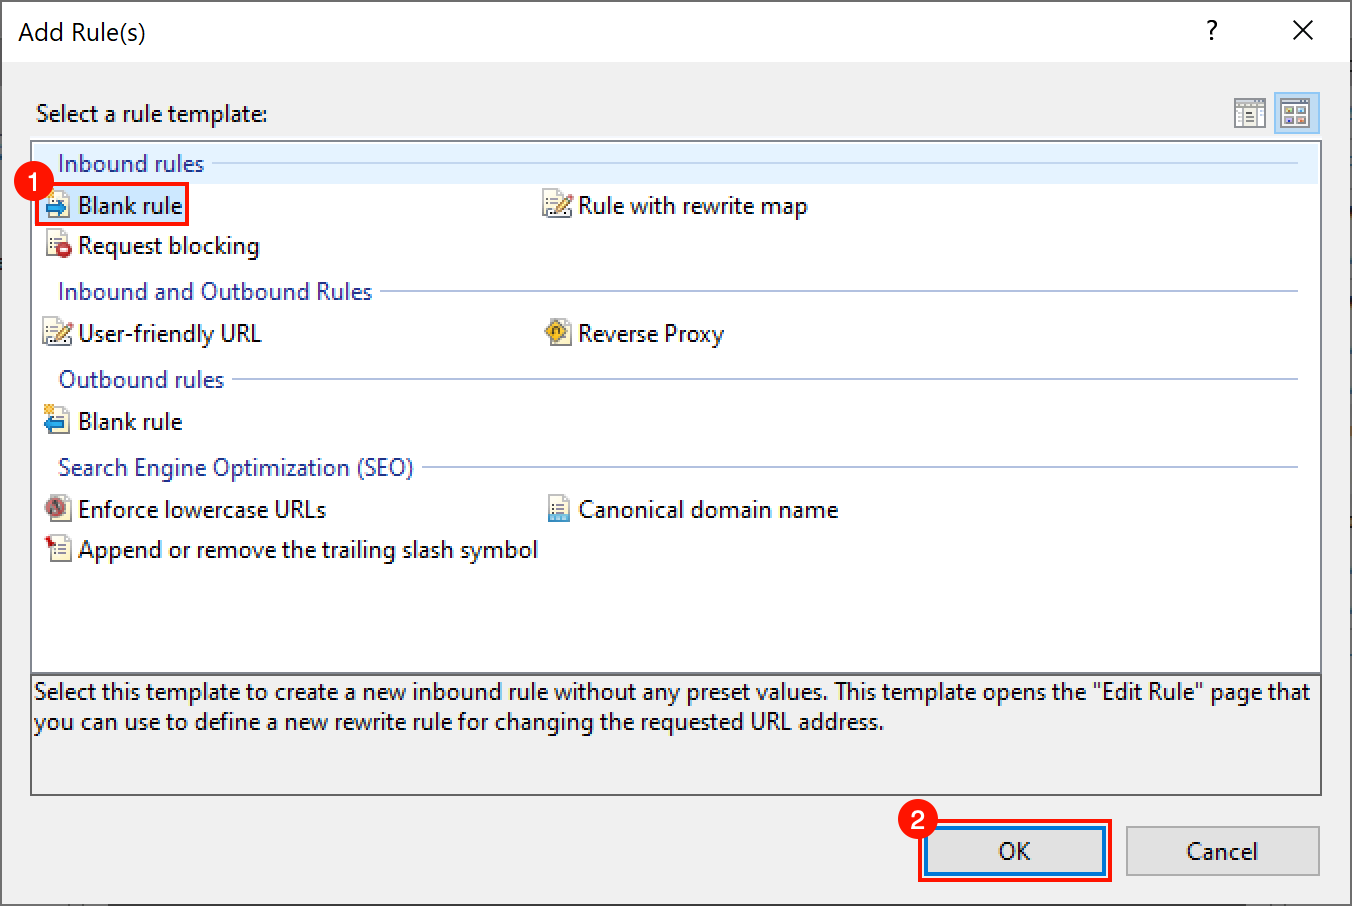
    Select site and open URL rewrite
  3. Click Add Rule(s)…
  4. Select Blank rule in the Inbound rules section, then click the OK button.
    Blank rule
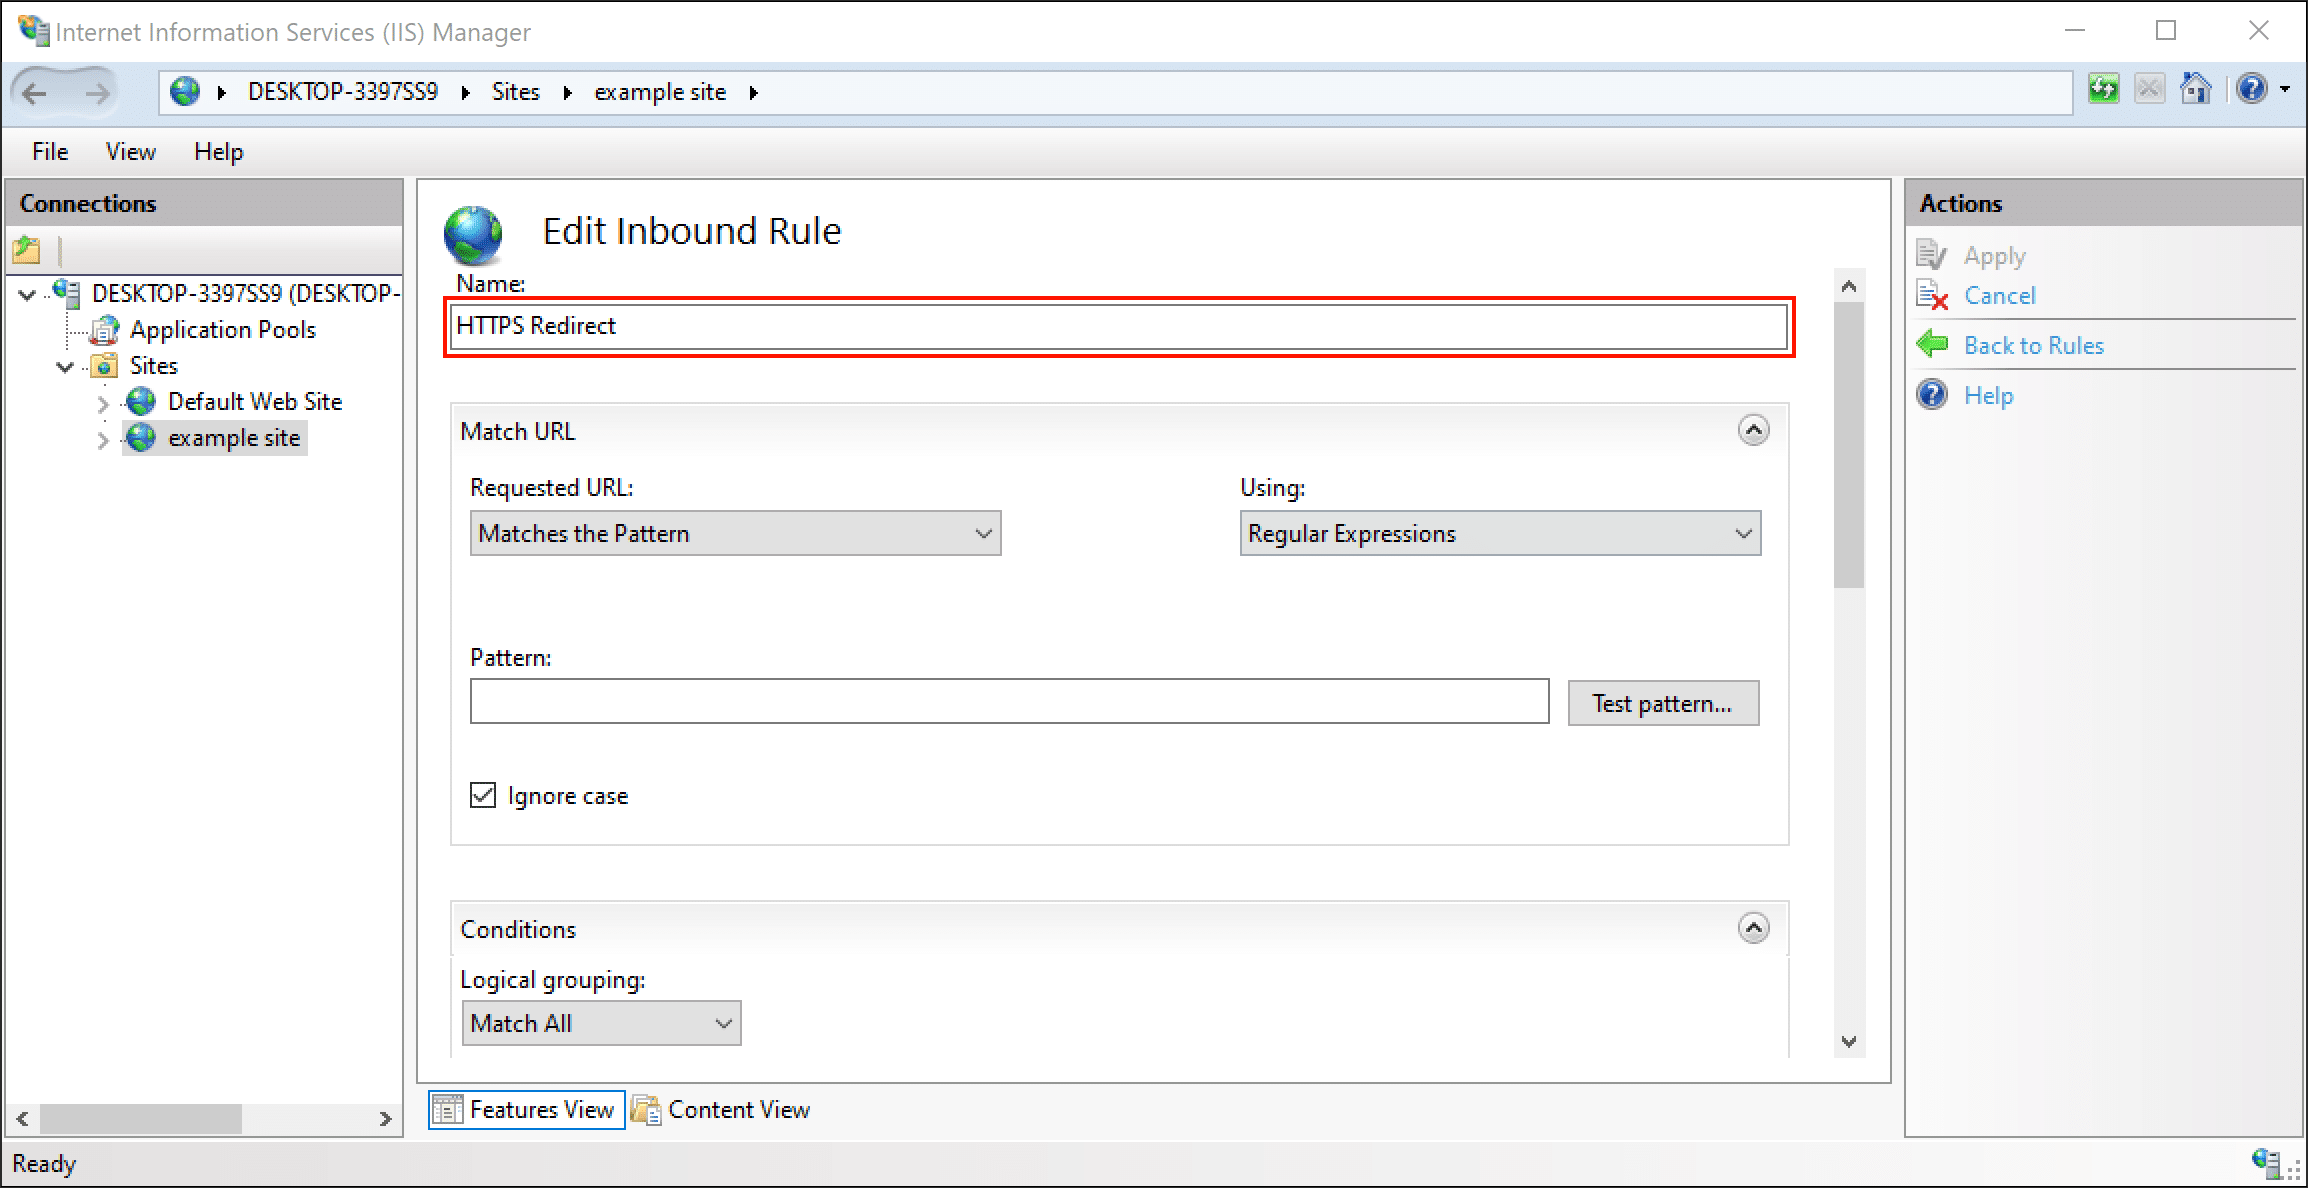
  5. Give your redirect an easy-to-remember name.
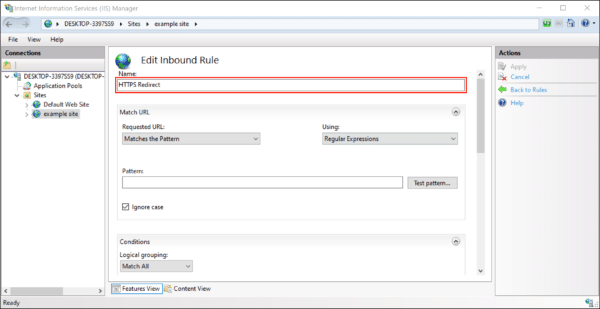
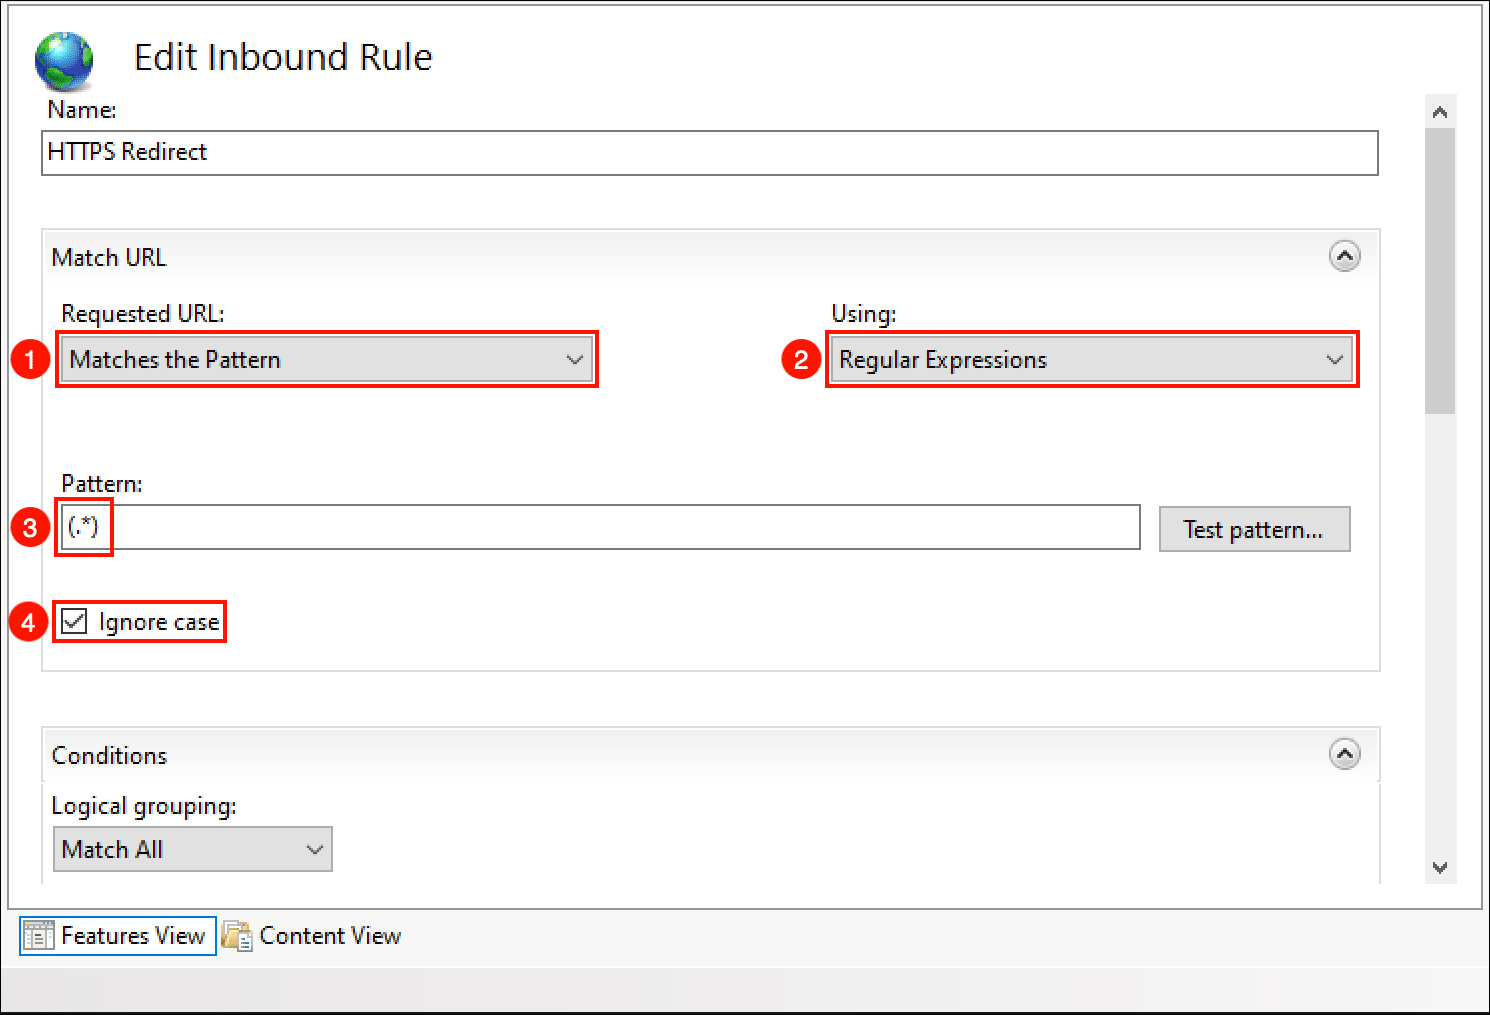
  6. In the Matched URL section:
    • Set Requested URL: to 
      Matches the Pattern
      .
    • Set Using to 
      Regular Expressions
      .
    • Enter 
      (.*)
       as the Pattern.
    • Check Ignore case.
    Match URL settings

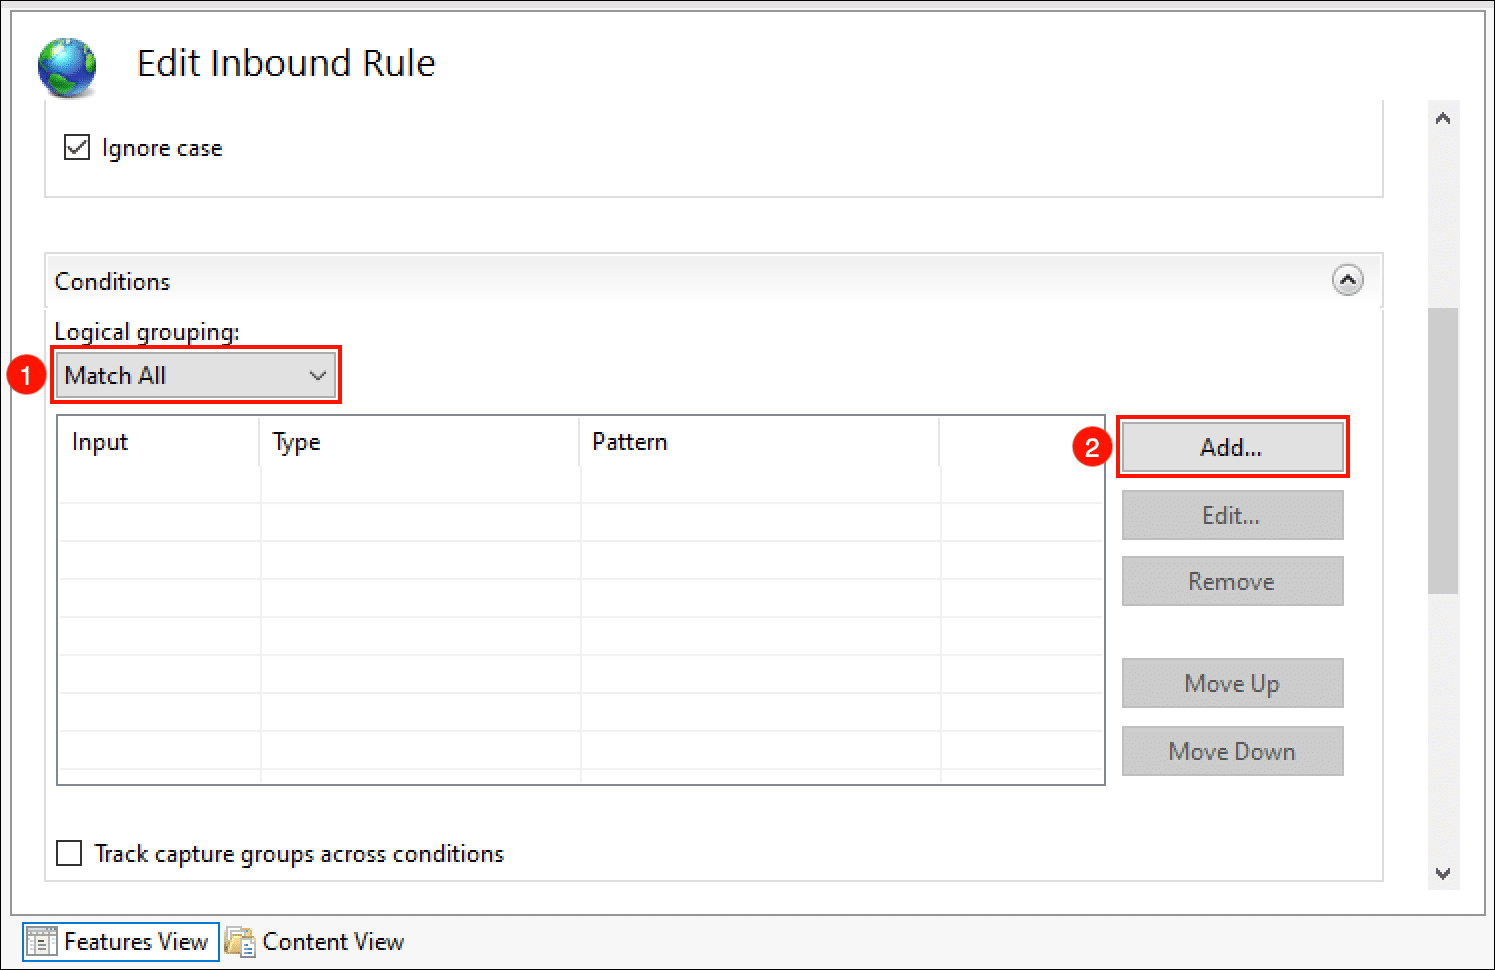
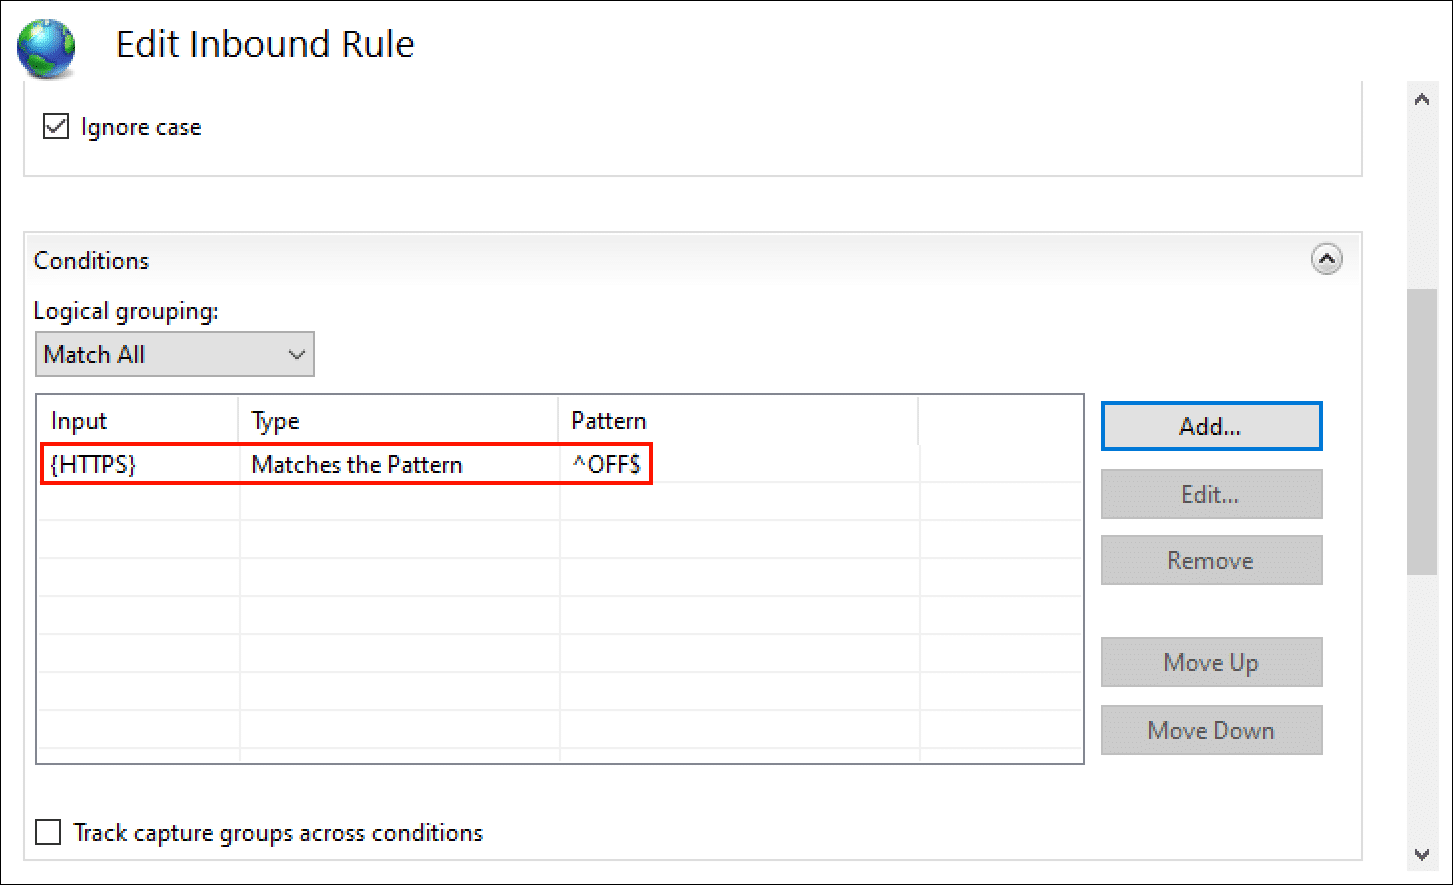
  7. Scroll down to Conditions and expand the section if necessary. Select 
    Match All
     for Logical grouping, then click the Add… button.
    select Match All and click Add
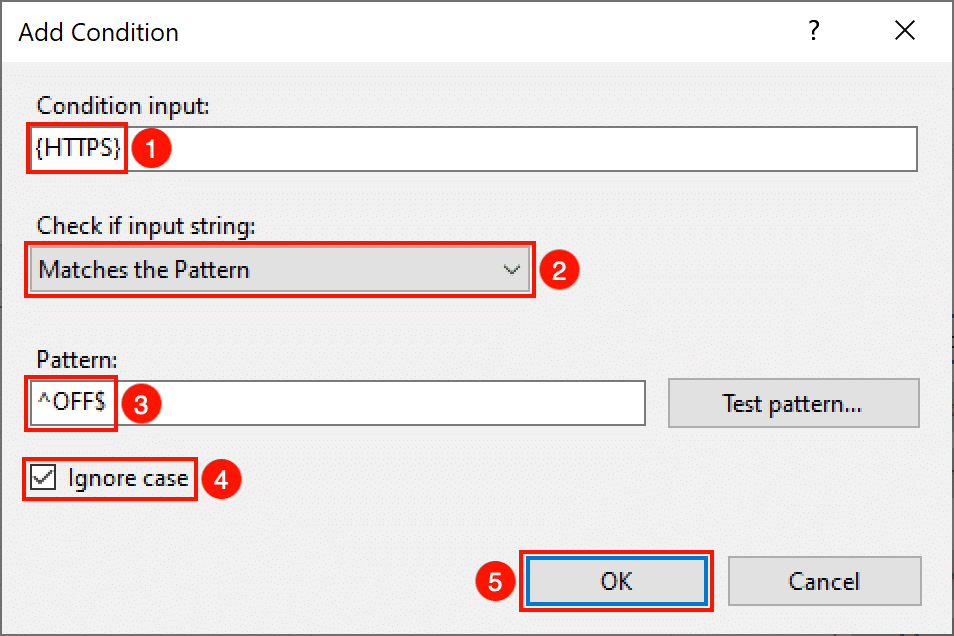
  8. A dialog box will open:
    • Type 
      {HTTPS}
       in the Condition input field.
    • Set Check if input string to 
      Matches the Pattern
      .
    • Type 
      ^OFF$
       in the Pattern field.
    • Check Ignore case.
    • Click the OK button.
    Add Condition

  9. You should now see your condition in the list.
    Condition in list
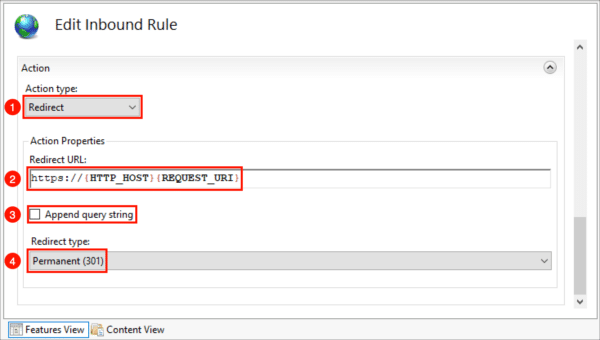
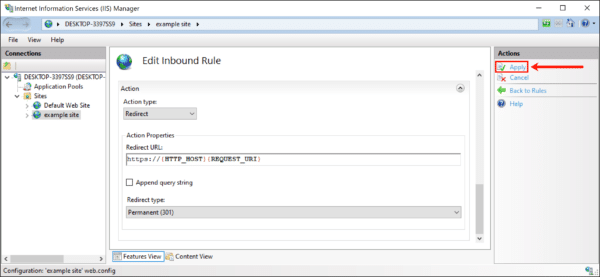
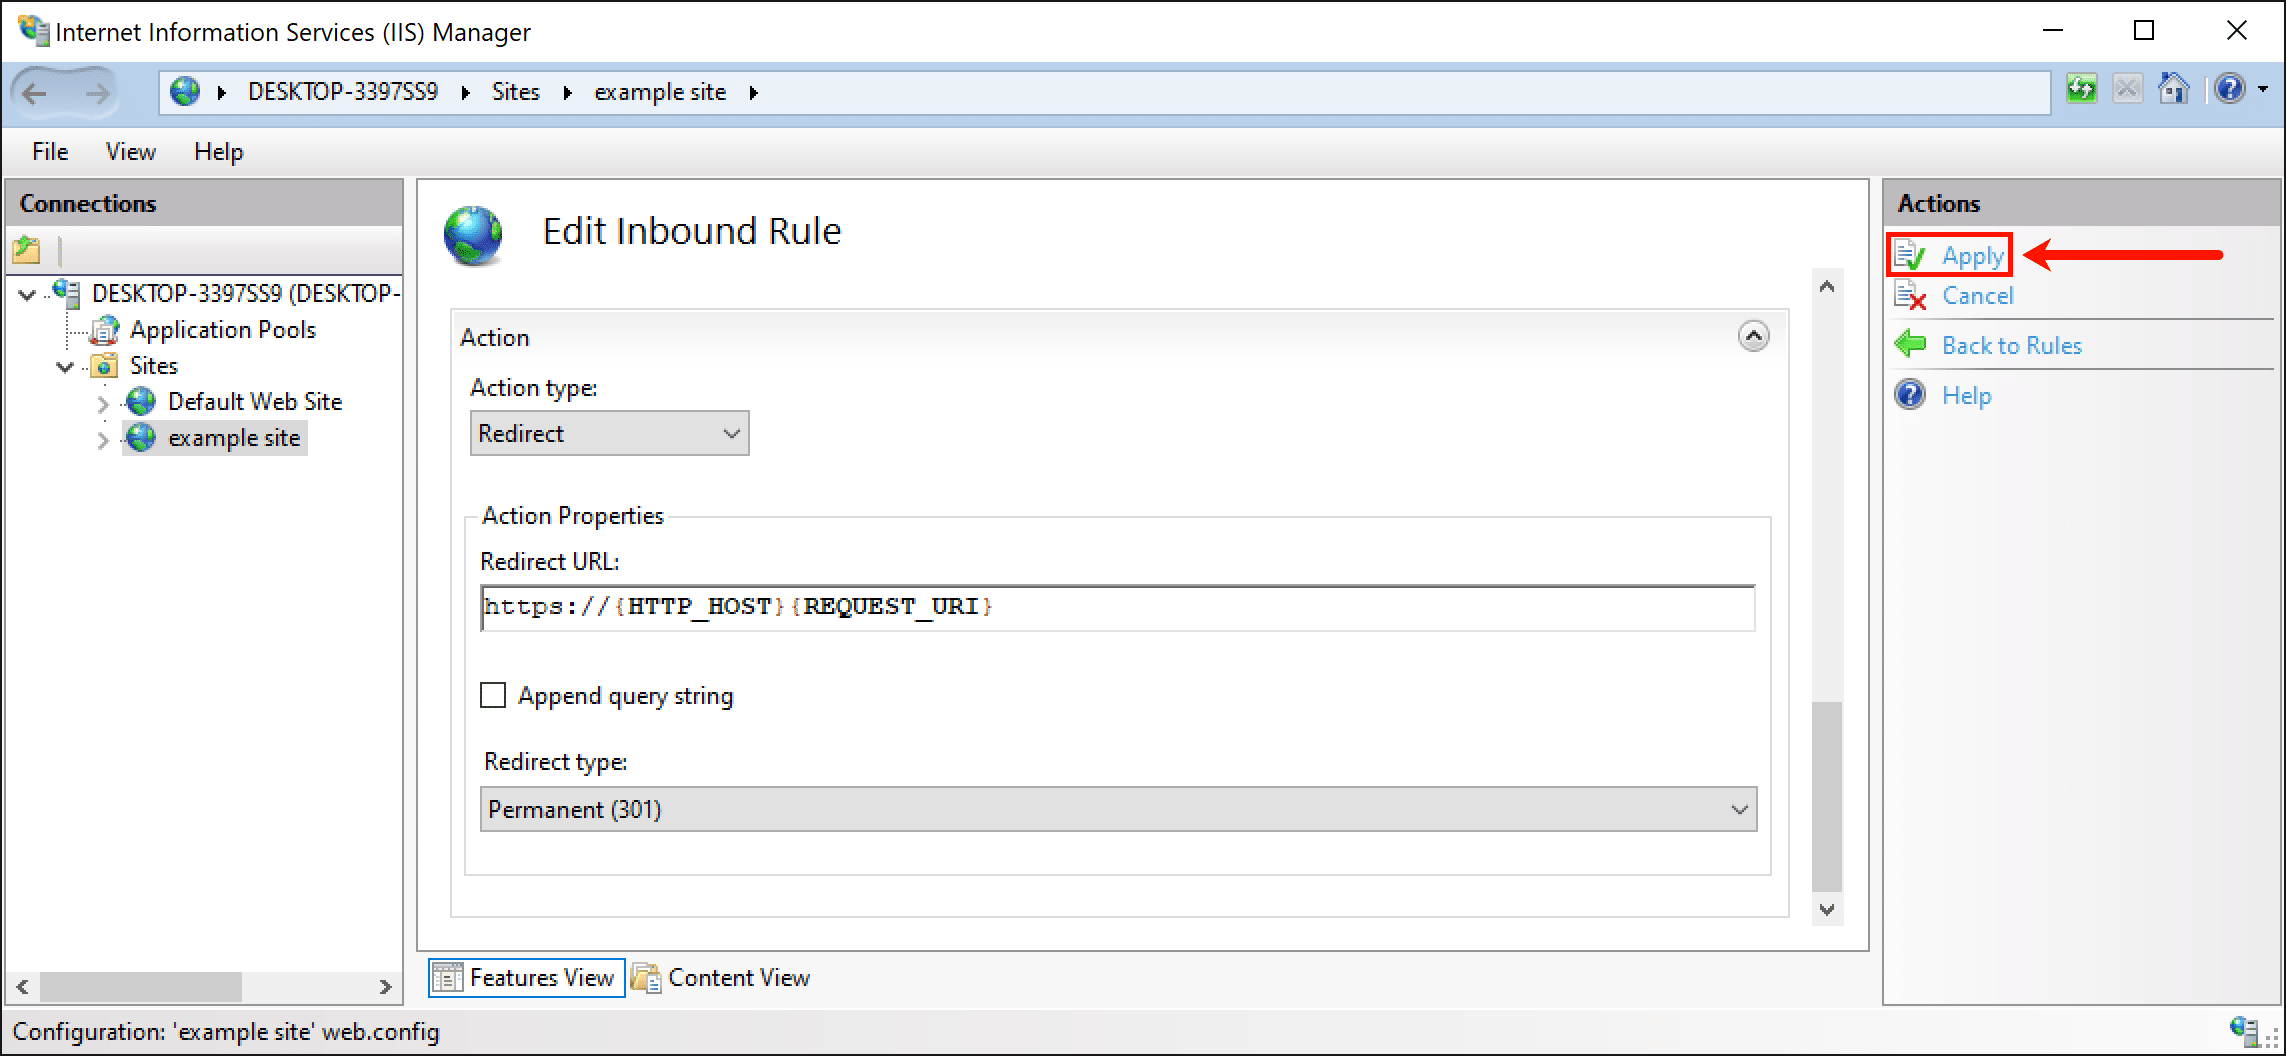
  10. Scroll down to the Action section and enter these settings:
    • Select 
      Redirect
       as the Action type.
    • Type 
      https://{HTTP_HOST}/{REQUEST_URI}
       in the Rewrite URL field.
    • Uncheck 
      Append query string
      .
    • Set Redirect type to 
      Permanent (301)
      .
    Edit Action
  11. Click Apply in the right-hand Actions menu.
    Click Apply

Comments

Popular posts from this blog

[RAID] SWITCH FROM AHCI TO RAID WITH INTEL C600 CONTROLLER

I personally have used other ways to do this. Manipulating some registry settings in combination with a safe boot before booting normally does the trick as well. This works with both SATA SSD and M.2 NVMe drives and it enables relatively fast switching between back and forth between AHCI and RAID. I have described this method below.  I have also tried the same process used to switch from RAD to AHCI and that works as well. Switch to safe boot Reboot into BIOS Change from AHCI to RAID in the BIOS Boot into safe mode Turn off safe mode and reboot normally again Nothing else and that also did the trick, just like with moving from RAID to AHCI.  So the link above and my step by step below is here for completeness. You have options in case one of them doesn’t work! Step by step AHCI to RAID registry method This procedure I describe below works on Windows 10 1803/1809 and has been tested on Dell Latitude E6220 an XPS 13 9360. Editing the registry is...

[Hyper-V] - Lỗi không boot vào được sau khi convert máy vật lý sang máy ảo

XỬ LÝ LỖI KHÔNG BOOT ĐƯỢC VÀO MÁY ẢO SAU KHI CONVERT TỪ MÁY VẬT LÝ BẰNG DISK2VHD Sau khi convert server vật lý sang file VHD để import vào Hyper thì khi start máy ảo lên màn hình máy ảo chỉ nhấp nháy con trỏ chuột trên màn hình đen (blinking cursor) NGUYÊN NHÂN Do máy vật lý sử dụng ổ đĩa cài OS được format theo chuẩn GPT (thay vì MBR như truyền thống, tham khảo GPT và MBR ) XỬ LÝ Bước 1: chuyển ổ GPT thành MBR Copy file VHD của ổ đĩa chứa OS về 1 máy tính Windows 8 trở lên Trên máy Windows 8+ click phải chuột lên file VHD vừa copy, chọn lệnh Mount . Lúc này dùng 1 phần mềm miễn phí (vd: Mini Partition Wizard ) để convert ổ đĩa vừa mount từ GPT  -> MBR Sau đó Delete phần Partition dư ra ở phần đầu ổ đĩa được mount (khoảng vài trăm MB) Set " Active " cho ổ đĩa này để là ổ đĩa boot OS Nhấn Apply để phần mềm thực thi tác vụ Sau khi phần mềm làm xong, tắt phần mềm Mini Partition Wizard, vào My Computer chọn eject ổ đĩa đang mount . Copy file VHD vừa đư...

LỖI "The provided partition "Migration...." is not a valid Migration mailbox"

  Solution for a valid Migration mailbox could not be found for this organization To address this issue, we will: Delete Migration mailbox in Active Directory Users and Computers Recreate Migration mailbox with /PrepareAD command Enable Migration mailbox with Exchange Management Shell 1. Delete Migration mailbox in Active Directory Users and Computers We do see the mailbox in ADUC, let’s remove it. If you don’t see it, search for it. It might be in a different container than the default container  Users . We can always verify in Exchange Management Shell if the Migration mailbox is present. If it shows up in the output, it means that it’s present and enabled. The output should be empty. [PS] C:\> Set - ADServerSettings - ViewEntireForest $true ; Get - Mailbox - Identity "Migration.8f3e7716-2011-43e4-96b1-aba62d229136" - Arbitration | Format-Table Name , ServerName , Database , AdminDisplayVersion , ProhibitSendQuota Copy 2. Recreate Migration mailbox with /Prepare...