
ĐỒNG BỘ USER ĐÃ CÓ TỪ AZURE CLOUD VỀ ACTIVE DIRECTORY

Source: https://www.alitajran.com/sync-azure-ad-user/

The sync status will show one of the following:

  • In cloud
  • Synced from on-premises

The below screen shows that the user Carol Baker is in the cloud and not synced from AD on-premises. However, the other two users are synced from on-premises.

Sync status in the cloud

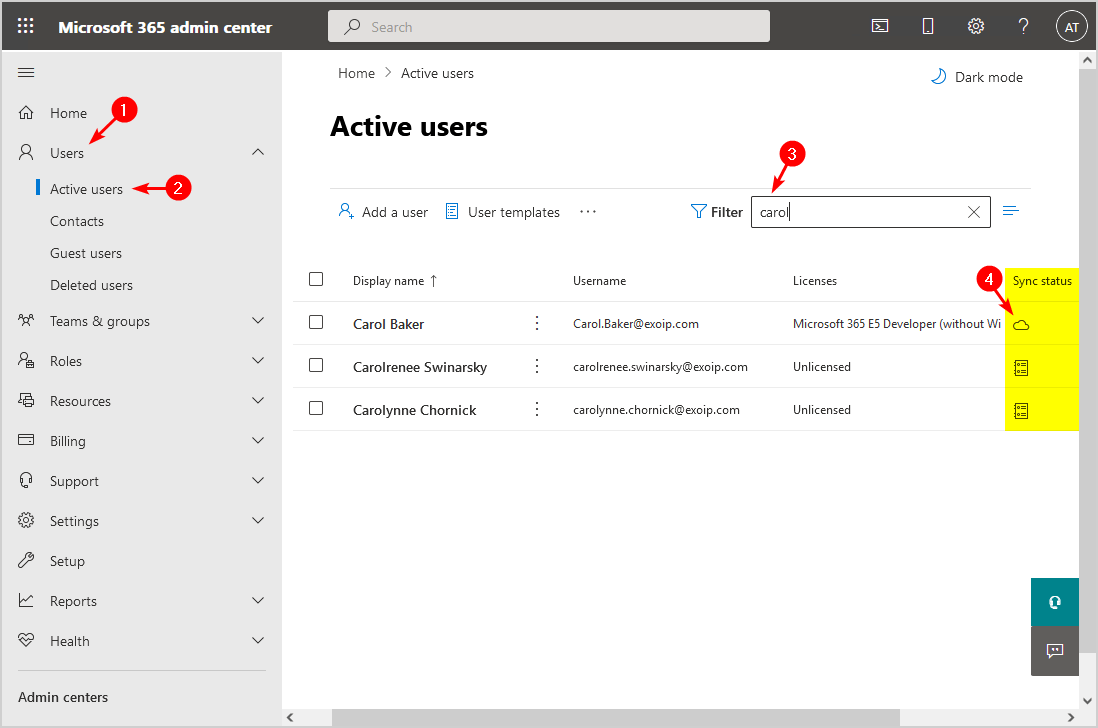
So how do we change the object in the cloud to synced from on-premises? Let’s look at how to sync the Azure AD user to on-premises AD in the next step.

How to sync Azure AD user to on-premises AD

To sync an Azure AD user to on-premises AD, follow these steps:

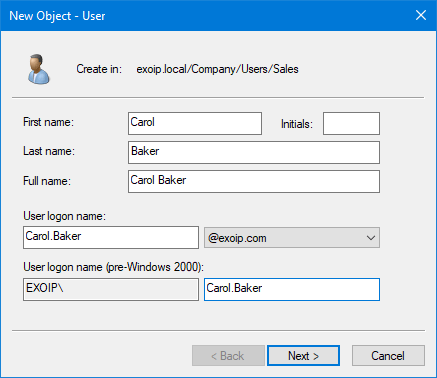
Step 1. Create on-premises AD user object

It’s essential to create an AD object identical to the cloud object:

  1. User logon name (UserPrincipalName)
  2. E-mail
  3. ProxyAddresses

Create an on-premises AD user object and fill in the details. Ensure that you fill in the user logon name identically to the cloud object.

Note: The password will reset to the one you create in AD on-premises. So it’s good to inform the user before you apply the change. Then, the user can reset the password later.

Sync Azure AD user to on-premises AD new object

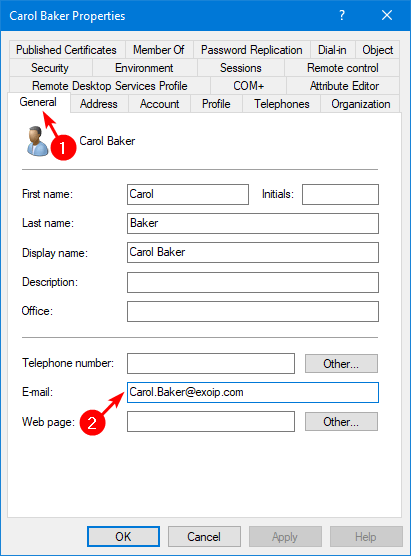
Fill in the E-mail identical to the cloud object.

Sync Azure AD user to on-premises AD email

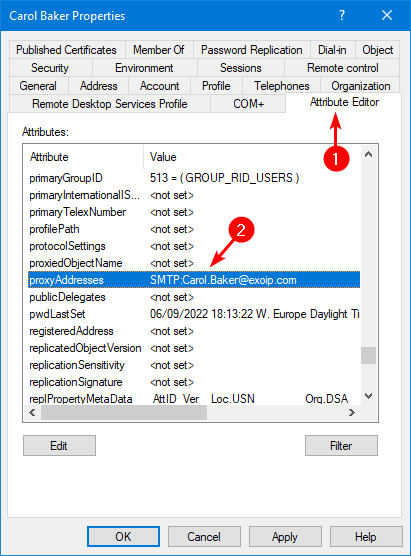
Fill in the proxyaddresses.

If the user has aliases, add them. Remember that SMTP (capital letters) is the primary email address and that smtp (small letters) are aliases.

Sync Azure AD user to on-premises AD proxyaddresses

Step 2. Force Azure AD sync

Sign in to the Azure AD Connect server and force a delta sync with PowerShell.

PS C:\> Start-ADSyncSyncCycle -PolicyType Delta

Result
------
Success

Step 3. Check Azure AD Connect synchronization service

Start the Azure AD Connect Synchronization Service Manager on the Azure AD Connect server. Verify that it adds the on-premises AD user object to Azure AD and that there are no errors.

Sync Azure AD user to on-premises AD sync

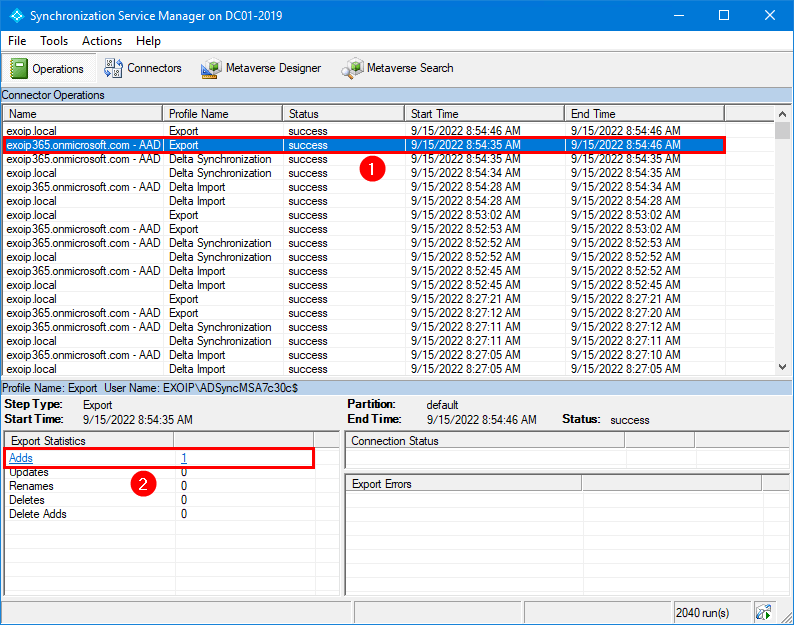
Click on the Distinguished Name.

Sync Azure AD user to on-premises AD sync object

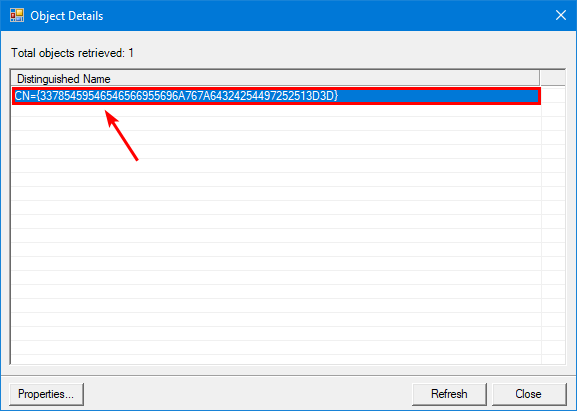
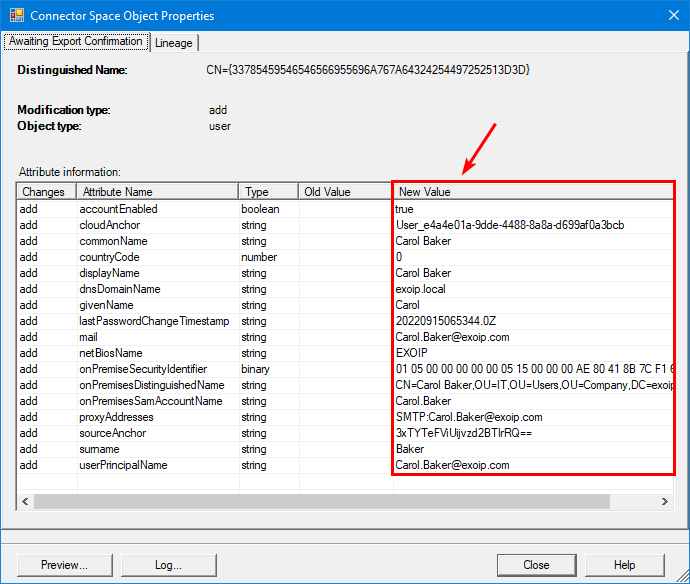
Verify that it adds the AD object.

Sync Azure AD user to on-premises AD sync export

Step 4. Verify AD object sync status

It’s good to give the Azure AD Connect synchronization service a little time (5-10 minutes) before you jump into Microsoft 365 admin center and check the sync status.

The Microsoft 365 admin center shows the sync status as synced from on-premises.

Sync status synced from on-premises

Comments

Popular posts from this blog

[RAID] SWITCH FROM AHCI TO RAID WITH INTEL C600 CONTROLLER

I personally have used other ways to do this. Manipulating some registry settings in combination with a safe boot before booting normally does the trick as well. This works with both SATA SSD and M.2 NVMe drives and it enables relatively fast switching between back and forth between AHCI and RAID. I have described this method below.  I have also tried the same process used to switch from RAD to AHCI and that works as well. Switch to safe boot Reboot into BIOS Change from AHCI to RAID in the BIOS Boot into safe mode Turn off safe mode and reboot normally again Nothing else and that also did the trick, just like with moving from RAID to AHCI.  So the link above and my step by step below is here for completeness. You have options in case one of them doesn’t work! Step by step AHCI to RAID registry method This procedure I describe below works on Windows 10 1803/1809 and has been tested on Dell Latitude E6220 an XPS 13 9360. Editing the registry is...

TẠO DKIM RECORD CHO EXCHANGE SERVER

  Source: https://www.linkedin.com/pulse/how-configure-dkim-exchange-2019-simple-way-seyed-abdollahi Installation In Exchange Online DKIM is a built-in service, but on an on-prem Exchange 2019 deployment we need a 3rd party application to add this functionality to our Exchange infrastructure. In this guide we use Stefan Profanter's excellent dkim-exchange application for this purpose, which is available here:  https://github.com/Pro/dkim-exchange/releases/latest After installing the program, we open  Configuration.DkimSigner.exe and click on the "Install" button, or download the installer straight from https://codeload.github.com/Pro/dkim-exchange/legacy.zip/v*** Configuration After installation finished, open the configurator. C:\Program Files\Exchange DkimSigner\Configuration.DkimSigner.exe Click on the "Configure" button and move the DkimSigner agent to the very bottom of the list. Under the DKIM settings tab select relaxed canonicalization as Exchange t...

GIA HẠN SSL CHO EXCHANGE SERVER 2019

LINK: https://www.alitajran.com/create-certificate-exchange-server/#h-step-2-generate-exchange-certificate-request  ==Create request SSL New-ExchangeCertificate -Server "EXIDC1" -GenerateRequest -FriendlyName "EXCERT2025" -PrivateKeyExportable $true -SubjectName "c=VN, s=HCM, l=HCM, o=TTT, ou=IT, cn=mail.ttt.vn" -DomainName mail.ttt.vn,autodiscover.ttt.vn,autodiscover.saigonxanh.com,autodiscover.mpu.edu.vn ==Complete SSL Import-ExchangeCertificate -FileData ([System.IO.File]::ReadAllBytes('\\exidc1\Cert$\2378696128.crt')) -PrivateKeyExportable:$true -Password (ConvertTo-SecureString -String 'tttcompany' -AsPlainText -Force)