
SỬA LỖI KHÔNG TRUY CẬP SMB ĐƯỢC SAU KHI UPDATE DSM 7

Nguyên nhân do DSM 7 yêu cầu bảo mật cao hơn nên các thiết bị client cũ cần nâng cấp phiên bản mới nhất thì mới truy cập được.

Nếu thiết bị client quá cũ không hỗ trợ thì buộc phải vào DSM hạ level bảo mật xuống như sau:
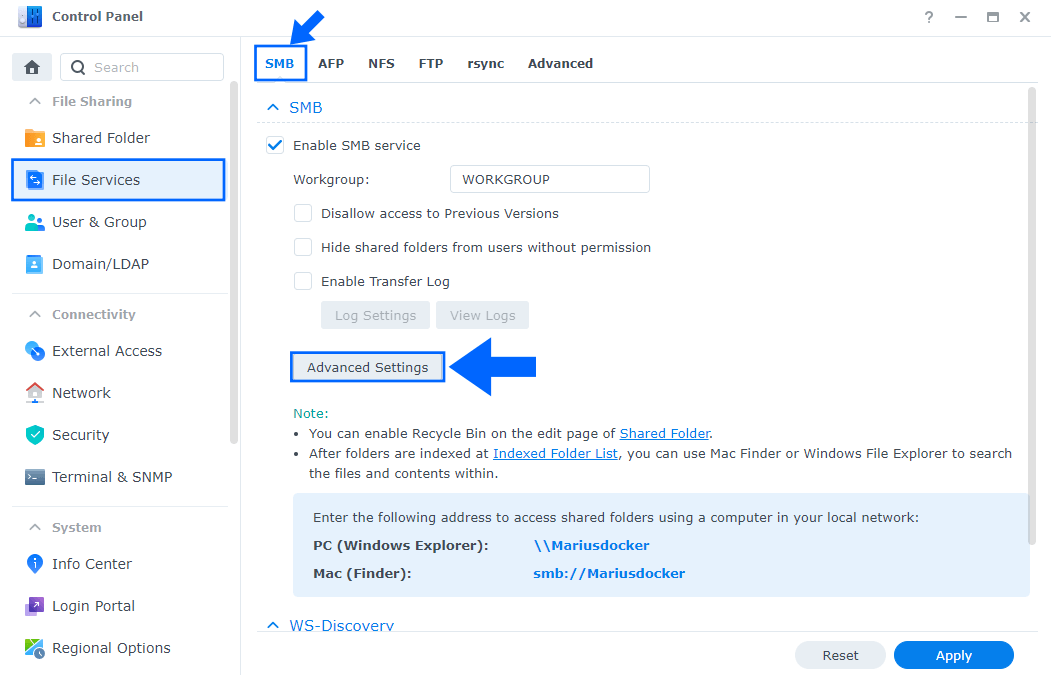
  • STEP 1

Go to Control Panel / File Services / SMB tab / Advanced Settings. Follow the instructions in the image below.
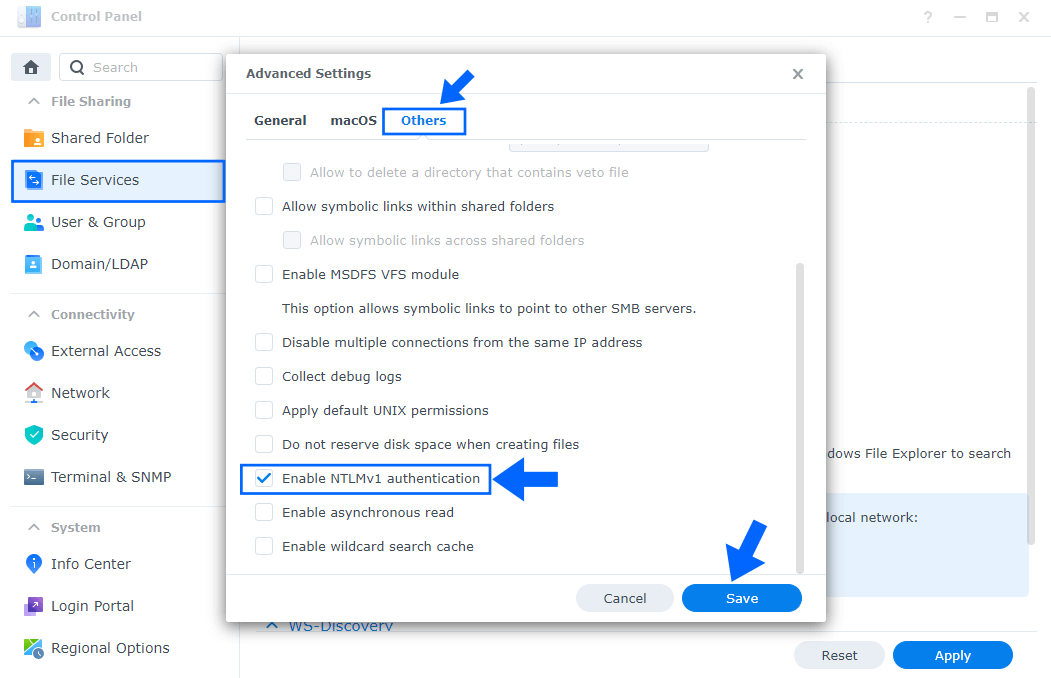
DSM 7 RC SMB disconnected device 1

  • STEP 2

After you click Advanced Settings on STEP 1, a new pop up window will open. Click on the Others tab then select Enable NTLMv1 authentication. Click Save. Follow the instructions in the image below.
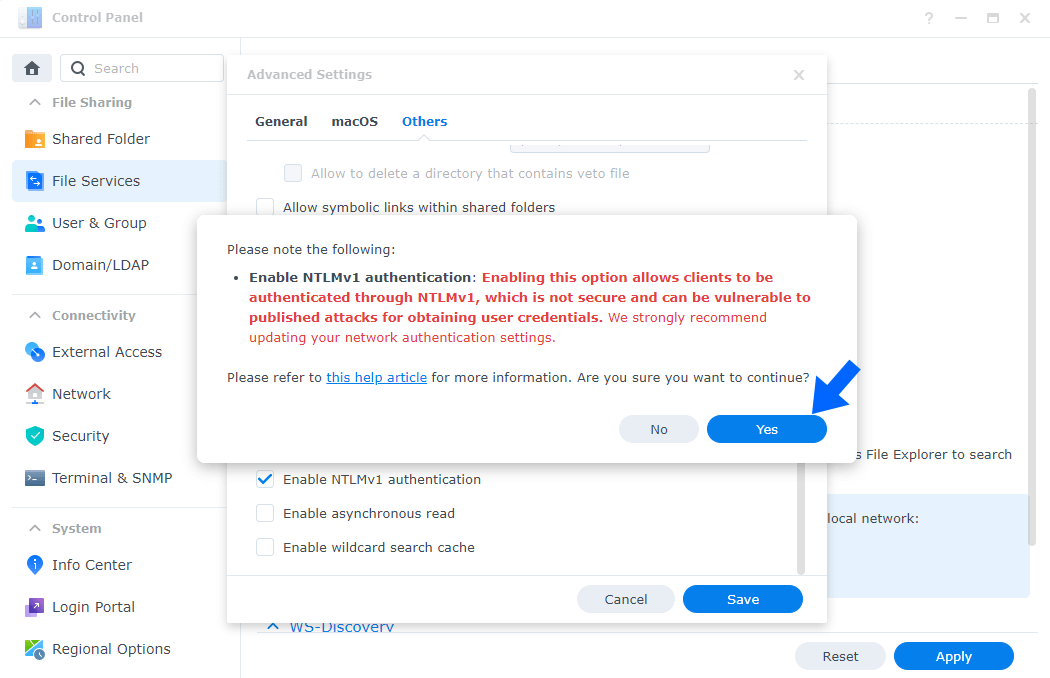
DSM 7 RC SMB disconnected device 2

  • STEP 3

After you click Save on STEP 2, a new warning pop up window will open. Click Yes. Follow the instructions in the image below.

DSM 7 RC SMB disconnected device 3

Nguồn: https://mariushosting.com/fix-synology-dsm-7-smb-clients-get-disconnected/

Comments

Popular posts from this blog

[RAID] SWITCH FROM AHCI TO RAID WITH INTEL C600 CONTROLLER

I personally have used other ways to do this. Manipulating some registry settings in combination with a safe boot before booting normally does the trick as well. This works with both SATA SSD and M.2 NVMe drives and it enables relatively fast switching between back and forth between AHCI and RAID. I have described this method below.  I have also tried the same process used to switch from RAD to AHCI and that works as well. Switch to safe boot Reboot into BIOS Change from AHCI to RAID in the BIOS Boot into safe mode Turn off safe mode and reboot normally again Nothing else and that also did the trick, just like with moving from RAID to AHCI.  So the link above and my step by step below is here for completeness. You have options in case one of them doesn’t work! Step by step AHCI to RAID registry method This procedure I describe below works on Windows 10 1803/1809 and has been tested on Dell Latitude E6220 an XPS 13 9360. Editing the registry is...

TẠO DKIM RECORD CHO EXCHANGE SERVER

  Source: https://www.linkedin.com/pulse/how-configure-dkim-exchange-2019-simple-way-seyed-abdollahi Installation In Exchange Online DKIM is a built-in service, but on an on-prem Exchange 2019 deployment we need a 3rd party application to add this functionality to our Exchange infrastructure. In this guide we use Stefan Profanter's excellent dkim-exchange application for this purpose, which is available here:  https://github.com/Pro/dkim-exchange/releases/latest After installing the program, we open  Configuration.DkimSigner.exe and click on the "Install" button, or download the installer straight from https://codeload.github.com/Pro/dkim-exchange/legacy.zip/v*** Configuration After installation finished, open the configurator. C:\Program Files\Exchange DkimSigner\Configuration.DkimSigner.exe Click on the "Configure" button and move the DkimSigner agent to the very bottom of the list. Under the DKIM settings tab select relaxed canonicalization as Exchange t...

GIA HẠN SSL CHO EXCHANGE SERVER 2019

LINK: https://www.alitajran.com/create-certificate-exchange-server/#h-step-2-generate-exchange-certificate-request  ==Create request SSL New-ExchangeCertificate -Server "EXIDC1" -GenerateRequest -FriendlyName "EXCERT2025" -PrivateKeyExportable $true -SubjectName "c=VN, s=HCM, l=HCM, o=TTT, ou=IT, cn=mail.ttt.vn" -DomainName mail.ttt.vn,autodiscover.ttt.vn,autodiscover.saigonxanh.com,autodiscover.mpu.edu.vn ==Complete SSL Import-ExchangeCertificate -FileData ([System.IO.File]::ReadAllBytes('\\exidc1\Cert$\2378696128.crt')) -PrivateKeyExportable:$true -Password (ConvertTo-SecureString -String 'tttcompany' -AsPlainText -Force)